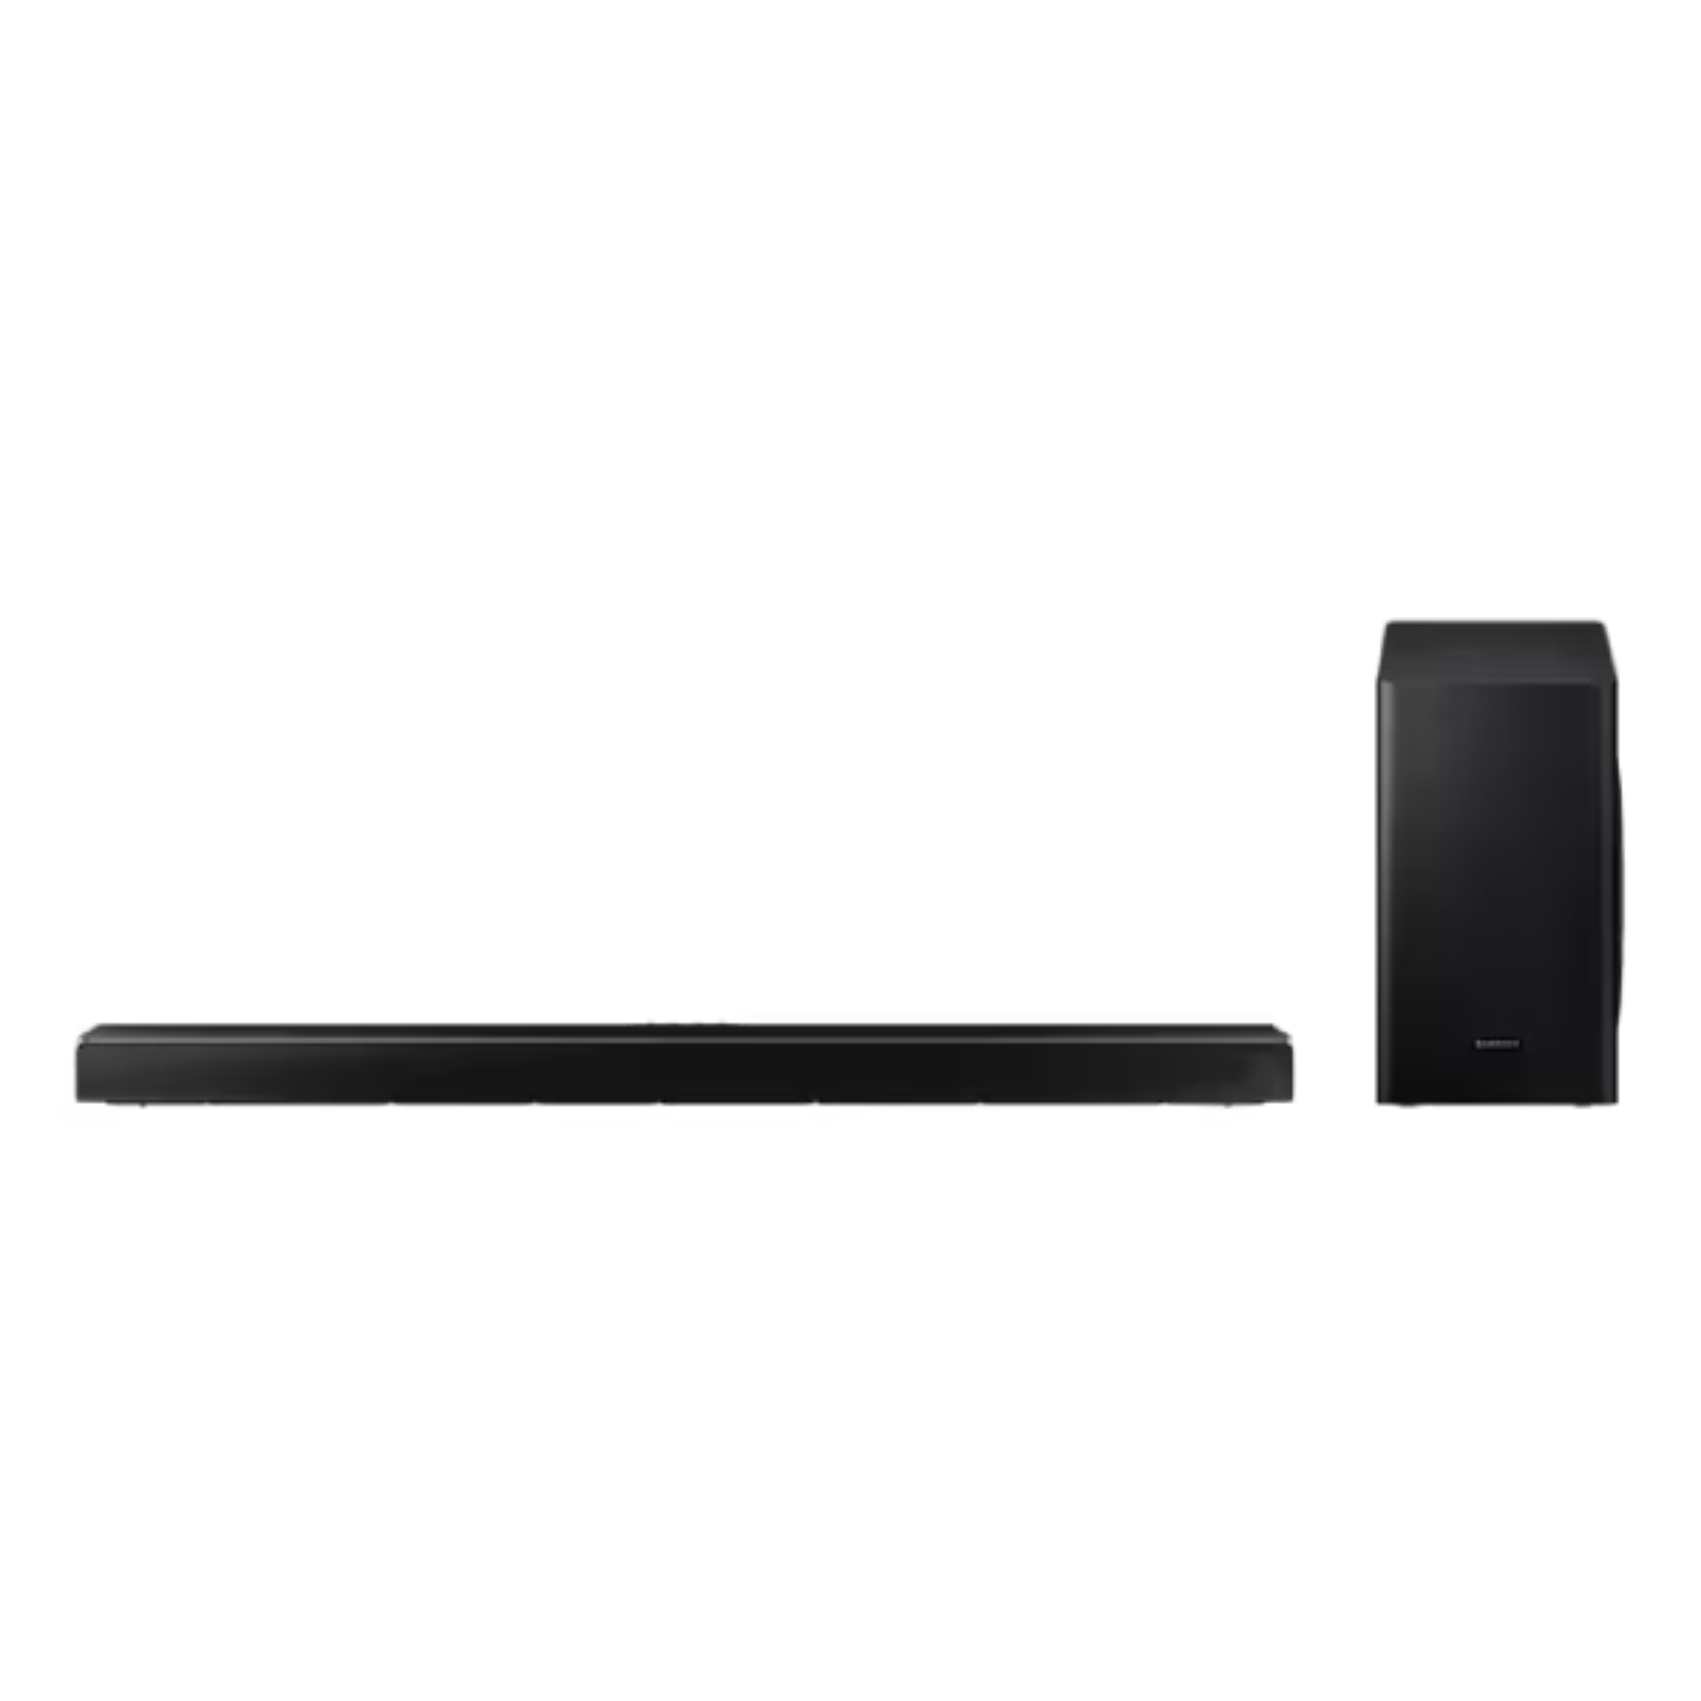
Soundbar 360W 5.1Ch Q60T -HW-Q60T/ZC
Model#: HW-Q60T/ZC

Overview:
The Samsung HW-Q60T/ZC Soundbar is a 5.1-channel audio system offering 360W of power for cinematic sound quality. With DTS Virtual:X and Acoustic Beam technology, it creates an immersive soundscape. Features like Adaptive Sound, Game Pro Mode, and a wireless subwoofer make it a versatile choice for any home entertainment setup.
PRICE GUARANTEE: Buy now with 60 days price protection.
Ratings & Reviews:
Literature
Reserve & Pick Up from Showroom »
| Distribution Centres | Address | Units Available |
|---|---|---|
| Brampton | 280 Rutherford Road S, | In stock |
| Etobicoke | Etobicoke | In stock |
| Mississauga | Mississauga | In stock |
| Springdale | Springdale | In stock |
Protect your purchase with an extended warranty.
- 2 Yr Extended - 24 months : $76.99
- 3 Yr Extended - 36 months : $119.99
- 4 Yr Extended - 48 months : $179.99
The Samsung HW-Q60T/ZC Soundbar is designed to enhance your home entertainment experience with powerful and immersive audio. This 5.1-channel soundbar delivers a total power output of 360W, providing rich, dynamic sound that brings movies, games, and music to life.
One of the standout features of the HW-Q60T/ZC is its support for DTS Virtual:X technology. This advanced audio format simulates overhead sounds, creating a 3D surround sound effect without requiring additional speakers. Combined with Samsung’s Acoustic Beam technology, the soundbar delivers precise, directional sound that enhances your viewing experience by placing you right in the middle of the action.
The inclusion of a wireless subwoofer ensures that low-frequency sounds, such as explosions or bass-heavy music, are reproduced with depth and clarity. This subwoofer is easy to place anywhere in the room, giving you the flexibility to optimize your audio setup for the best performance.
For an even more tailored audio experience, the soundbar includes Adaptive Sound technology, which automatically adjusts the sound settings based on the content you're watching. Whether it’s a dialogue-heavy drama or a fast-paced action movie, the HW-Q60T/ZC ensures every detail is crystal clear. Gamers will also appreciate the Game Pro Mode, which enhances directional sound cues, giving you a competitive edge during gameplay.
The HW-Q60T/ZC offers seamless connectivity with Bluetooth and HDMI ARC support, making it easy to connect to your TV, smartphone, or other devices. Additionally, the soundbar is compatible with Q-Symphony, allowing it to synchronize with select Samsung TVs for a more immersive audio-visual experience.
Aesthetically, the HW-Q60T/ZC boasts a sleek, minimalist design that fits seamlessly into any modern living room. Its compact form factor ensures it doesn’t take up much space, and it can be wall-mounted for a clean and clutter-free setup.
In summary, the Samsung HW-Q60T/ZC Soundbar combines advanced audio technologies, user-friendly features, and a stylish design, making it an excellent addition to any home theater setup. It is ideal for those seeking immersive sound quality and versatile performance.
Let me know if you'd like further details!
| Key Features | |
|---|---|
| Connectivity | Bluetooth®, HDMI, Optical, USB |
| Inputs/Outputs | HDMI In/Out (ARC), Optical, USB |
| design | |
| Color | Black |
| Sound (Processing) | |
| Sound modes | Standard, Music, Clear Voice, Sports, Movie |
| Feature | |
| Weight (Subwoofer) | 5.9 kg |
| Weight (Soundbar) | 2.6 kg |
| Dimensions (Subwoofer) | 179 x 361 x 299 mm |
| Dimensions (Soundbar) | 1010 x 54 x 87 mm |
| Total Power Output | 340 Watts |
| Subwoofer Type | Wireless, 7-inch driver |
Reviewed by 0 customers
Protect your purchase with an extended warranty.
- Protect your purchase for 24 months: $76.99 CAD
- Protect your purchase for 36 months: $119.99 CAD
- Protect your purchase for 48 months: $179.99 CAD
Fridge Installations:
- If a whole new waterline is necessary, it is recommended that this service be obtained.
- When our delivery crew arrives, they will uncrate and transfer your new refrigerator into position if it is intended to replace the refrigerator you already have. It will not be plugged in by them.
- In the event that there is access to the floor from the ground, the installation will comprise sixty feet of waterline.
The packing will not be removed by our installer, nor will they offer carry away services. Reversing the door of the refrigerator is a service that may be provided for an additional fee.
Gas Range Installations:
- Please note that this bundle does not include any packing removal services.
- Unfortunately, haul away is not included in this service.
- Additional fees will be assessed if shut-off valves, gas permits, or any other kind of special carpentry work is required in order to accommodate the new appliance.
- If a totally new installation is required, please get in touch with us and decide for an on- site estimate. Immediately after the conclusion of the on-site inspection, our installer will offer a comprehensive estimate of the work that is necessary as well as the cost that is related with it. Each and every price associated with an on-site inspection is non- refundable and must be paid for at the TELETIME store in your immediate vicinity. Including all necessary plumbing and electrical work, as well as any other trades and permissions that are needed to support the completion of the new installation, this encompasses everything essential.
Gas Dryer with Flexible Hose Installation:
- The purchase of this service is recommended if there was a gas dryer already installed in the premises.
- If a totally new installation is required, get in touch with us and make arrangements for an on-site estimate. Immediately after the conclusion of the on-site inspection, our installer will offer a comprehensive estimate of the work that is necessary as well as the cost that is related with it. Each and every price associated with an on-site inspection is non-refundable and must be paid for at the Teletime store in your immediate vicinity.
- The packing will not be removed by our installer, nor will they offer carry away services.
- If any shut-off valves, gas permits, vent-less exhaust kits, conversion kits, vent hose, stacking of goods, expansion and reduction adapters, or special carpentry work is required in order to accommodate the new appliance, additional fees will be incurred.
White Glove Dryer Installation (only works with electric dryers):
- The delivery person will finish this task when they arrive to deliver the package.
- At the place of purchase, there will be additional fees that apply.
Washing Machines with White Glove Service:
- The delivery person will finish this task when they arrive to deliver the package.
- At the place of purchase, there will be additional fees that apply.
Dishwashers with Hoses and Haul Away Service
- The packing will be removed off the device, and our installer will pick it up and bring it to you.
- A simple installation into an already existing outlet is shown here.
- Included in this installation service is a braided fill hose made of stainless steel that is six feet long and serves as the supply line.
- The old unit will be removed by our installer, who will also dispose of all the packaging and other materials.
- Any risers, air gaps, pigtails, elbows, on/off switches, working in crawl spaces, or special carpentry work that is required to remove the previous unit may result in additional expenses being incurred.
- If a totally new installation is required, please get in touch with us and make arrangements for an on-site estimate. Immediately after the conclusion of the on-site inspection, our installer will offer a comprehensive estimate of the work that is necessary as well as the cost that is related with it.
Dishwashers with Hoses
- A simple installation into an already existing outlet is shown here.
- Before beginning the installation, you are required to remove the packing.
- If you have not ordered delivery via our installer, your unit need to be positioned near the location where it is going to be installed before our delivery workers arrive.
- Kindly detach the unit that you currently have.
- Included in this installation service is a braided fill hose made of stainless steel that is six feet long and serves as the supply line.
- If the removal of the previous unit requires the use of any risers, air gaps, pigtails, elbows, on/off switches, working in crawl spaces, or special carpentry work, additional fees will be incurred.
Ductless Range Hoods Installation
- This service does not involve the removal of packing materials or the disposal of packaging.
- If a totally new installation is required, please get in touch with us and decide for an on- site estimate. Immediately after the conclusion of the on-site inspection, our installer will offer a comprehensive estimate of the work that is necessary as well as the cost that is related with it. Each price associated with an on-site inspection is non-refundable and must be paid for at the TELETIME store in your immediate vicinity. Including all necessary plumbing and electrical work, as well as any other trades and permissions that are needed to support the completion of the new installation, this encompasses everything essential.
Ducted Range Hoods Installation:
- This service does not involve the removal of packing materials or the disposal of packaging.
- If a totally new installation is required, please get in touch with us and make arrangements for an on-site estimate. Immediately after the conclusion of the on-site inspection, our installer will offer a comprehensive estimate of the work that is necessary as well as the cost that is related with it. Each price associated with an on-site inspection is non-refundable and must be paid for at the Teletime store in your immediate vicinity. Including all necessary plumbing and electrical work, as well as any other trades and permissions that are needed to support the completion of the new installation, this encompasses everything essential.
Island Canopy or Vent Installation:
- There will be no drywall patching or painting included in this package, nor will there be any relocating of the current duct work.
- This service does not involve the removal of packing materials or the disposal of packaging.
- If a totally new installation is required, please get in touch with us and make arrangements for an on-site estimate. Immediately after the conclusion of the on-site inspection, our installer will offer a comprehensive estimate of the work that is necessary as well as the cost that is related with it. Each price associated with an on-site inspection is non-refundable and must be paid for at the Teletime store in your immediate vicinity. Including all necessary plumbing and electrical work, as well as any other trades and permissions that are needed to support the completion of the new installation, this encompasses everything essential.
Over the Range Installation:
- Before installation, remove the unit's packing and do a thorough inspection.
- Electrical service should be disconnected from the current OTR.
- Disconnect the Duct
- Install, center (if at all feasible), and secure the support bracket for the new OTR in accordance with the specifications provided by the manufacturer.
- The exhaust fan should be checked and rotated, if necessary, in order to ensure that there is enough ventilation.
- If required, connect and seal to the duct that is already in place.
- Connect the OTR cable to the receptacle and fasten it with the hardware that is supplied.
- Put in place all of the racks, panels, coverings, and/or filters that are accessory.
- The OTR should be tested by turning on and monitoring a heating cell (using a container that is filled with water), the exhaust fan, and all of the lights and accessories that are still present.
- In the event that the OTR is put inside a ductless installation, the installer will make certain that the auxiliary charcoal filter is fitted correctly.
For your information, all of the accompanying packaging of the device that was installed will be disassembled and stored in a storage facility or outdoors, depending on the circumstances.
Most Frequent Overages:
- Dedicated electrical line operating at 110 volts.
- Either converting a circular vent into a rectangular vent or the other way around
- Putting in place a box for electrical outlets if an incorrect service was offered.
- The installation of additional ductwork to facilitate the switch from perpetual exhaust to recirculating or vice versa.
- Working on the carpentry to make room for the new OTR.
Electric Cooktop Installation:
- Before installing, take out the unit's packing and give it a check.
- Place the cooktop in the opening.
- Adjust the leveling brackets to the cabinet floor to ensure that the cooktop is erect.
- Fasten the cooktop firmly to the counter.
- Glue leveling brackets to the cabinet's bottom.
- Insert the proper power cable into the cabinet.
- Attach the cooktop to the outlet and electrical box.
- Insert the cooktop power cable into the outlet. Test the cooktop by turning on all of the surface burner elements, all of the controls, and all of the accessories (such as the clock, timer, and setting).
Please take note that all related packaging for the installed equipment will be disassembled and stored outdoors if needed.
Typical Overages
- Carpentry to make the replacement appliance fit.
Gas Cooktop Installation:
- Before installing, take out the unit's packing and give it a check.
- Disconnect the gas from the appliance after turning off the gas supply at the shut-off valve and making sure the gas is off there. If there isn't a shut-off valve, there may be extra costs to turn off the gas and install a shut-off valve, but they can't go above the approved additional fee estimate that the client is given.
- Fasten the cooktop firmly to the counter.
- Glue leveling brackets to the cabinet's bottom.
- Adjust the leveling brackets to the cabinet floor to ensure that the cooktop is erect.
- Plug the cooktop power cable into an outlet and connect the cooktop to the electrical box and receptacle.
- Insert the proper power cable into the cabinet.
- Make sure the line is sealed up and leak-free.
- Attach the new gas appliance's ventilation and gas service.
- Restart the gas supply and check for leaks in all the connections.
- Check for leaks and keep an eye on the gas supply.
- Make that the appliance has all its accessories installed, including lint filters, burner faps, racks, grease, and trousers.
- Test the gas appliance by turning on and keeping an eye on all the surface burner elements, controls, and accessories (such as a clock, timer, and setting), as well as all of the ventilation connections (make sure all burner elements are adjusted to exhibit the correct flame characteristics).
- Includes the new, code-mandated flex hose.
Please take note that all related packaging for the installed equipment will be disassembled and stored outdoors if needed.
Typical Overages
- Off-the-shelf conversion kits
- Custom woodworking to make the new item fit.
Wall Oven Installation:
- Single wall ovens will be installed by a two-person crew.
- Cut off the electric oven's power supply and unplug the device.
- Make sure the electrical cable is disconnected to avoid damaging the outlet.
- Attach the new electric oven's electrical supply.
- Make that the appliance has all of its attachments (burns caps, racks, trousers, grates, etc.) attached.
- To test a wall oven, turn it on and keep an eye on all of the burner elements on the outside, the broiler, the oven, OR the inside heating elements, all of the controls, all of the accessories (such as a clock, timer, or setting), the oven door, and the storage drawer.
Please take note that all related packaging for the installed equipment will be disassembled and stored outdoors if needed.
Typical Overages
- When a new unit is shorter than an old one, shelf build-up.
- gas to electric conversion OR vice versa (may need local gas supplier and/or electrician)
- Customer woodworking to make the new appliance fit.
BBQ Installation:
- Take the device out of the packaging and check that there are no broken or missing parts.
- Building the Barbecue Installing any add-ons like the side burner, ignitor, etc.
- After installation, go over appropriate functioning and installation with the client.
- final cleanup of the construction site
Please take note that all related packaging for the installed equipment will be disassembled and stored outdoors if needed.
Please do not hesitate to get in touch with Teletime if you do not find the service that you seek. One may choose from a broad variety of services, some of which might not be included on the list.
Related Products
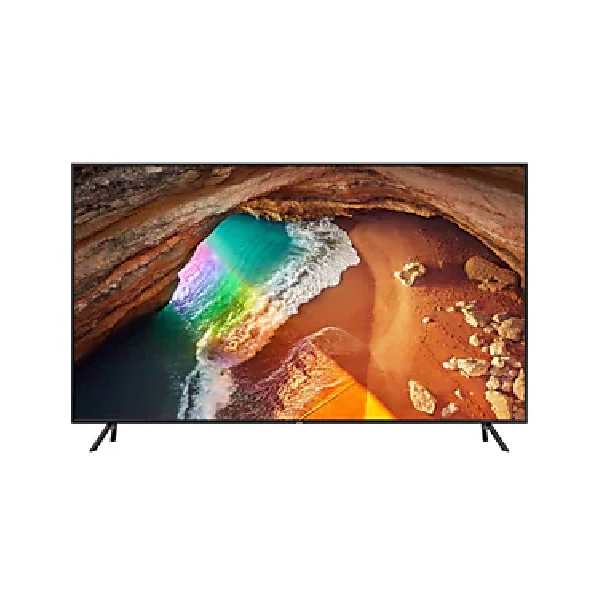
Samsung QN82Q6DRAFXZC
In Stock
82" 2019 Q6DR 4K Smart QLED TV -QN82Q6DRAFXZC
- 82-inch QLED 4K Smart TV
- Quantum Dot technology for vibrant colors
- 4K UHD resolution for sharp, clear visuals
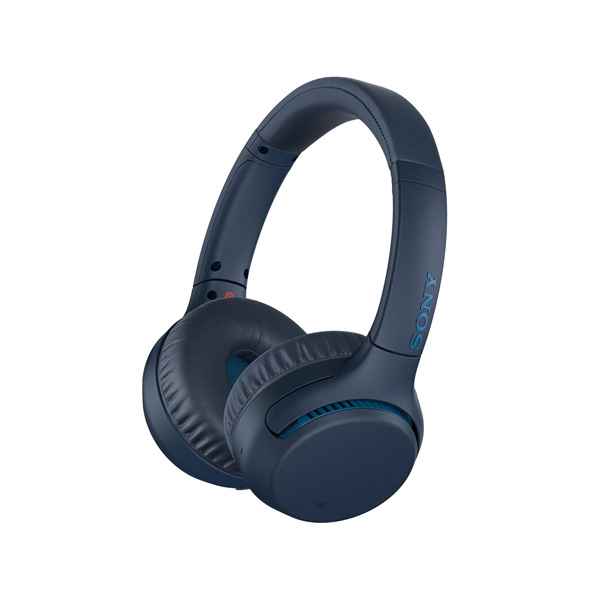
Sony WHXB700/B
In Stock
Wireless Headphones-WHXB700/B
- Extra Bass for powerful, punchy sound.
- Bluetooth connectivity for wireless listening.
- Up to 30 hours of battery life with quick charging.
- Built-in microphone for hands-free calls.
- Lightweight and comfortable design for all-day wear.
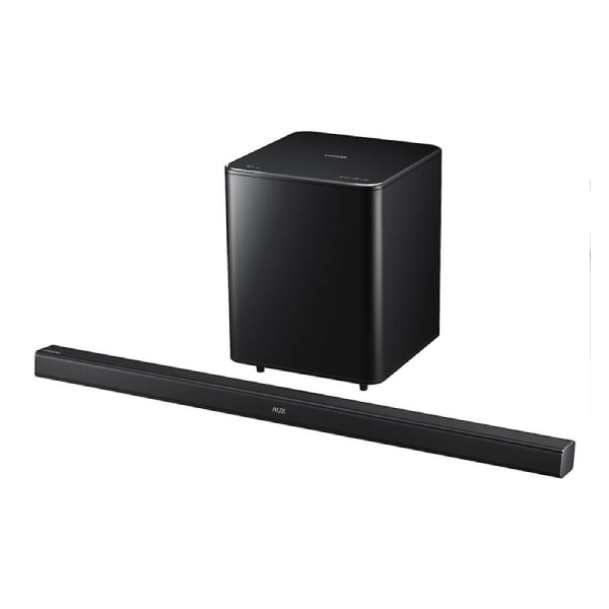
Samsung HWH550
In Stock
Powered home theater sound bar with wireless subwoofer and Bluetooth® -HWH550
- 2.1-Channel Sound System: Delivers rich, immersive audio with a dedicated wireless subwoofer.
- Bluetooth® Connectivity: Stream music wirelessly from compatible devices.
- Slim Design: Compact and stylish soundbar fits seamlessly with modern TVs.
- Convenient Setup: Easy connection to TVs with multiple input options, including optical and HDMI.
Samsung QN43QN90BAFXZC

In Stock
43" Neo QLED 4K TV QN90B
- Quantum Matrix Technology
- Neo Quantum Processor 4K
- Quantum HDR 32x
- Dolby Atmos
Sony XBR55X900F
In Stock
4K Ultra HD High Dynamic Range (HDR) Smart TV (Android TV)-XBR55X900F
- 4K HDR resolution with Dolby Vision for stunning visuals.
- Full-array LED backlighting for precise contrast and brightness control.
- TRILUMINOS Display for enhanced color accuracy and vivid imagery.
- Android TV with Google Assistant for smart features and voice control.
- Sleek, minimalist design with narrow bezels for a modern look.
Samsung QN55Q7FNA
In Stock
55" 2018 Q7F 4K Smart QLED TV -QN55Q7FNA
- Advanced QLED display with Quantum Dot technology for vibrant and true-to-life colors.
- 4K UHD resolution and HDR support for enhanced brightness, clarity, and contrast.
- Smart TV with voice control integration and minimalist, nearly bezel-free design.
Samsung QN75Q60RAFXZC
In Stock
75" 2019 Q60R 4K Smart QLED TV -QN75Q60RAFXZC
- Brilliant QLED Display: Quantum Dot technology for vivid colors and 4K Ultra HD resolution.
- Smart TV Experience: Powered by Tizen OS with voice assistants and popular streaming apps.
- Elegant Design: Slim, bezel-less design with Ambient Mode for added functionality.
Sony VPLHW45ES

In Stock
SXRD Home Cinema Projector-VPLHW45ES
- Full HD 1080p resolution for crisp and clear images.
- Advanced SXRD technology for excellent contrast and vibrant colors.
- High brightness and wide color gamut for true-to-life visuals.
- Flexible lens shift and zoom for easy installation and alignment.
- Whisper-quiet operation for a more immersive viewing experience.
Sony MDRXB510AS/B

In Stock
Earphone Heavy Bass Model Black with a Waterproof/Sports-MDRXB510AS/B
- Extra Bass for deep, punchy sound, ideal for music lovers.
- Water-resistant design perfect for sports and outdoor use.
- In-line microphone for hands-free calling and easy control.
- Secure, ergonomic fit with adjustable ear hooks for comfort.
- Flat, tangle-free cable for easy storage and convenience.
Samsung UN55TU8000FXZC
In Stock
55" 2020 TU8000 Smart 4K UHD TV -UN55TU8000FXZC
- 55-inch 4K UHD Resolution
- Crystal Clear Picture Quality
Recently Viewed Products
Sony XBR55A8H
In Stock
55" Sony A8H Series XBR55A8H 4K Ultra HD High Dynamic Range Smart TV
- One-Slate design concept
- Power your soundtracks
- Narrow metal bezel
- Works with Google Home
- Cable clutter minimized
Samsung HWJ8500R

In Stock
350 W 5.1 Ch Curved Soundbar -HW-J8500R
- 350W 5.1 Channel curved soundbar with wireless subwoofer.
- Dolby Digital and DTS surround sound for immersive audio.
- Bluetooth® connectivity for wireless audio streaming.
- Wall-mountable design for a clean, space-efficient setup.
Samsung HW-Q60T/ZC

In Stock
Soundbar 360W 5.1Ch Q60T -HW-Q60T/ZC
- 5.1-channel system with a total power output of 360W
- Supports DTS Virtual:X and Samsung Acoustic Beam for immersive sound
- Wireless subwoofer for deep and impactful bass
- Adaptive Sound and Game Pro Mode for optimized audio performance
Sony WH1000XM5/B

In Stock
Wireless Industry Leading Noise Canceling Headphones-WH1000XM5/B
- Improved noise cancellation with dual noise-sensor technology.
- Up to 30 hours of battery life with fast charging support.
- High-resolution audio with LDAC and DSEE Extreme technology.
- Customizable touch controls and voice assistant support.
- Ultra-lightweight design for enhanced comfort during long use.